

The new TeleprompterPAD iLight PRO 14'' v 15.0 comes almost fully pre-assembled so putting it together takes less than one minute. Find bellow a series of short, quick and easy video tutorials that will help you getting your TeleprompterPAD iLight PRO 14'' v15.0 set and ready to use.
This guide contains the following main sections:
- Box contents - Unboxing TeleprompterPAD iLight PRO 14''
- Placing the knob and the hood on your TeleprompterPAD iLight PRO 14"
- How to attach your TeleprompterPAD iLight PRO 14" to a tripod
- How to attach a camera to your TeleprompterPAD iLight PRO 14"
- How to record with a smartphone on the TeleprompterPAD iLight PRO 14"
- How to fit the tablet to your TeleprompterPAD iLight PRO 14"
- How to carry your TeleprompterPAD iLight PRO 14"
Getting Started: Tips & Tricks to improve the quality of your recordings:
- How far away should I stand from the teleprompter? A quick guide to avoiding eye movement
- Recommended Focal lenght for a proper Field of View (FOV)
You might also be interested in:
Box contents - Unboxing TeleprompterPAD iLight PRO 14''
What will you find in the box:
- 1x Pre-assembled teleprompter unit: aluminum plates + hardware + Reflective Beamsplitter Glass mounted on its aluminum frame.
- 1x Black knob screw: to set the angle of the glass
- 1x Adjustable blackout hood
- 1x Remote Control
- 1x 1/4 screw with handle: to attach your camera/smartphone to the top plate
- A smartphone clamp
- 4x Sticky rubber pads: to provide grip for your iPad/Tablet
- 1x Cleaning wipe: for your beamsplitter glass
- 1x Rigid transport case
- Quick start guides
Placing the knob and the hood on your TeleprompterPAD iLight PRO 14"
Watch the video below to learn how to easily attach the blackout hood to your TeleprompterPAD iLight Pro.
Unboxing the new TeleprompterPAD iLight PRO 14'' v 15.0 has never been so easy, since it is sold pre-assembled, with just a couple steps left to complete in order to be ready to use it.
How to attach your TeleprompterPAD iLight PRO 14" to a tripod
You can attach your teleprompter to a tripod in less than a minute.
Despite the iLight Pro v15.0 being designed to allow being used on top of any flat surface, thanks to its stable base, it is always advisable to use in combination with a tripod.
This will enable you to set the height, position and orientation of the TeleprompterPAD more precisely and effectively.
How to attach a camera to your TeleprompterPAD iLight PRO 14"
Find bellow a short video showing how to attach your camera to your TeleprompterPAD.
Once your TeleprompterPAD iLight PRO v15.0 is on your tripod, the next step is to attach your camera to the top plate (if you want to use your Smartphone to record, please refer to the next section).
Attaching your camera to the teleprompter can be achieved by using the provided 1/4" universal camera screw that you will find among the components of your TeleprompterPAD pack.
How to record with a smartphone on the TeleprompterPAD iLight PRO 14"
Watch a simple demonstration of this easy process.
In order to use a Smartphone as a camera in combination with the TeleprompterPAD iLight PRO you will need to use the provided Smartphone Clamp + 1/4" universal camera screw. Please, find this items in your TeleprompterPAD Pack. You can also use our convenient smartphone adaptor:
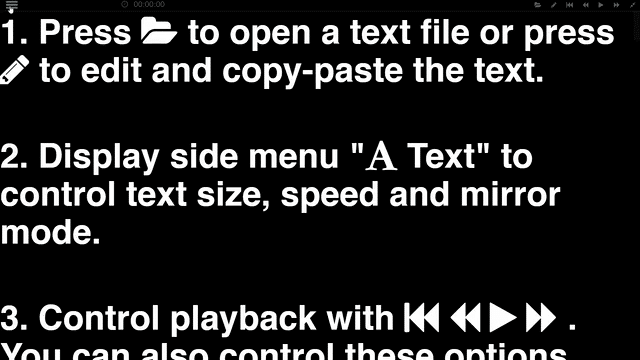
How to fit the tablet to your TeleprompterPAD iLight PRO 14"
In the following video tutorial you will learn how to set up your iPad/Tablet on your TeleprompterPAD.
In order to be able to read your scripts on your new TeleprompterPAD, you will need to use an iPad/Tablet as a source of text.
Problems? Mirror mode or beam splitter glass projection not working as expected? Can't you read the text on the teleprompter? Try blocking your tablet's screen rotation or read this short article.
How to carry your TeleprompterPAD iLight PRO 14"
Learn to fold and transport your teleprompter to take it with you anywhere!
One of the biggest advantages of the TeleprompterPAD iLight PRO v15.0 is its portability. Unlike other bulky and inconvenient teleprompters in the market, our model is foldable and can be easily transported in the provided hardcase that you will find in the TeleprompterPAD Pack.
Getting Started: Tips & Tricks to improve the quality of your recordings
In this section you will find some tricks that will help you making the most out of your new TeleprompterPAD. Read through the following tips to easily improve the quality of your recordings with this quick and free pieces of advice!
How far away should I stand from the teleprompter? A quick guide to avoiding eye movement
Eye movement: in the teleprompting environment, is an unwanted effect that appears when we do not use the teleprompter at a suitable distance in relation to the width of the text lines configured on the screen. The effect appears when the viewer can clearly see that the talent's eyes move horizontally across the lines of text when reading.
Tablet-based or iPad-based teleprompters are an adaptation of classic camera teleprompters for large TV studios. These "big brothers" of our iPad teleprompters are large devices used from a long distance. The distance of use and the size of the screen are calibrated for comfortable reading while avoiding unwanted eye movement.
The same principle applies for our teleprompters. They should be used at a distance and text size that prevents eye movement. The recommended working distance for the 14'' model is to stand at least 2m-2.5m [6.5ft-8ft] away from the teleprompter and to use a large text size showing only about 7-10 lines of text per screen.
What if I don't have as much space in my recording room or I prefer to record with the teleprompter on the desk? No problem, you just have to reduce the line width and the size of the text to adapt it to your distance of use until the eye movement disappears. This is something very easy to adjust on our TeleprompterPAD app [this link opens in a new tab without closing this page].
Recapping: Key Points to Avoid Eye Movement When Using a Teleprompter
- Place your tablet on the tray and open your teleprompter APP. Set a thick text font to a large size (7 lines per screen).
- To read, separate yourself at a minimum distance of 2m to 2.5m (6.5t to 8ft).
- Or if you need a lower separation distance, then adapt the appropriate margins and text size to your needs in the app.
Recommended focal lenght for a proper Field of View (FOV)
Choosing an appropriate focal lenght for your camera when recording on a teleprompter is key to avoiding unnecesary post-production crops. This is usually a result of using focal lengths that are too short and which cause the frame of the teleprompter glass to show in the shot. For this reason, using something such as a 50mm lens would be optimal.
Although the closest equivalence of a lens to the human eye is 43mm, the 50mm is one of the most common lens sizes in the market and provides a very ‘true’ picture when it comes to object perception and size, as it does not introduce any distortion to the image.
However, going lower than 50mm is perfectly possible, as focal lengths as short as 18mm have proven to perform without any issues when combined with this teleprompter size, so if you have a lens that is 18mm or higher there is no need to worry.
DISCLAIMER: pushing this number below 18mm will potentially show the edge of the glass frame or the tablet tray.
So remember, as long as you stay over 18mm when using the TeleprompterPAD® iLight PRO 14'', you will be able to obtain perfect shots without having to do any post-processing to your recordings.
Remote control: How to use TeleprompterPAD with bluetooth remote
Learn how to set your teleprompter remote No need to read the entire guide, go directly to the part that interests you, depending on your system and APP.
We hope you enjoy your new teleprompter. If you have any questions or suggestions, please contact us.


Comments
0 comments
Article is closed for comments.